Your profile is where you can add your profile image, change your password. Grab your Classic key and set up fields that go on the itinerary footer.
My Profile
The Profile icon presents two subtabs, the My Profile subtab and the Footer Setup subtab. My Profile is a place to update your account details.
- To access your profile, select the profile icon on the bottom-left corner of the navigation side bar to open the profile page.
- By default your My Profile will be open.
- Administrators and Agents can update their Name, Email address or Phone number in the My Profile section.
- You can further access the Classic key here if you are pushing your itinerary from Tourwriter. To learn more, refer to Tourwriter .NET Integration.
Note: For detailed steps on different user roles within Tourwriter and the admin privileges over the agent, performing admin tasks, please refer to Getting Started- the User Roles article.
Add a Profile image
If you are an administrator or an agent in Tourwriter, you can set up your personal profile picture in Tourwriter.
- Go to your profile settings by choosing Profile in the top-right corner.
- You will access the default My Profile sub tab. Scroll to the Profile image section at the bottom and select edit to add your profile picture from the Media library.
- Select Save profile to save the changes.
Note: The profile picture will show up in the itinerary footers, the itinerary library page, itinerary PDFs, itinerary comments and the organisation users list.
Adding new footer fields
You can set your default footer fields in your Profile settings. The standard footer fields include the user’s Email and Phone. To add a new field to the footer:
- Navigate to your profile settings by choosing Profile in the bottom-left corner of the side bar.
- Switch to the Footer Setup sub tab.
- Click Add field to open the New field popup
- Fill in the field’s Display name, the Field content and an optional URL.
Note: You can edit, duplicate or delete the existing default footer fields through the Options menu at the end of the row.
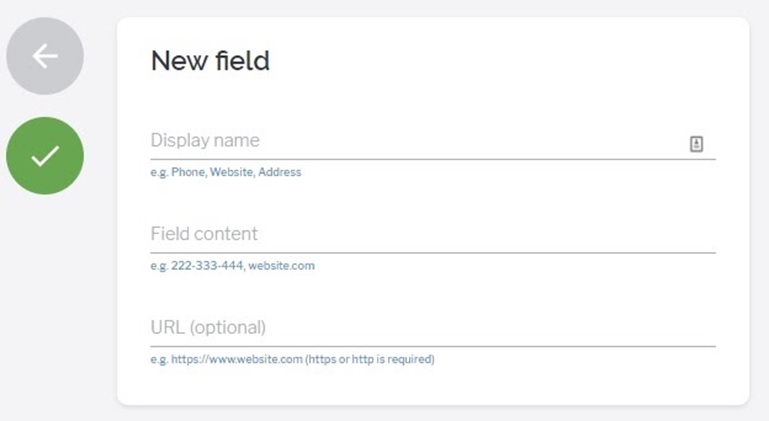
Tip: You should add new fields that best represent your business. Take a look at the example below.
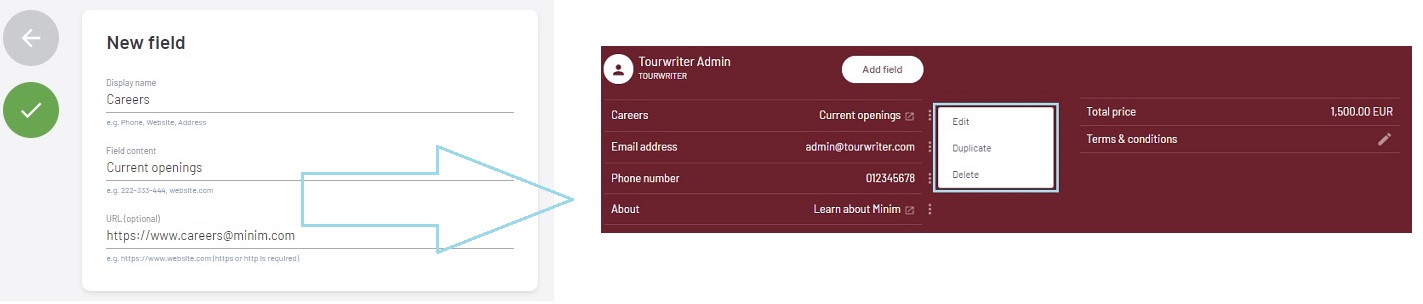
Note: The footer fields will show up on the itinerary footer of all itineraries that you create from here on in. Footers on previously created itineraries will not be affected.