Tourwriter makes receiving payments from your travellers a whole lot easier with the Stripe payment processing option. Connect to your Stripe account in Tourwriter to activate this Pay now payment option.
Note: The Pay now button displays when the itinerary is shared either Privately or Publicly and also in the Preview tab.
Setting up your Stripe account
The first step to setting up payments in Tourwriter is to connect your Stripe Account to Tourwriter.
- On your homepage, navigate to Organisation > Integrations.
- In your Integration settings, click the Connect button in the Stripe account section to link Tourwriter to your Stripe account.
- If you do not have a Stripe account you will be directed to complete a sign up form via the Stripe website.
- If you already have a Stripe account, click Sign in, using your existing Stripe login details.
Accepting a Payment via Tourwriter
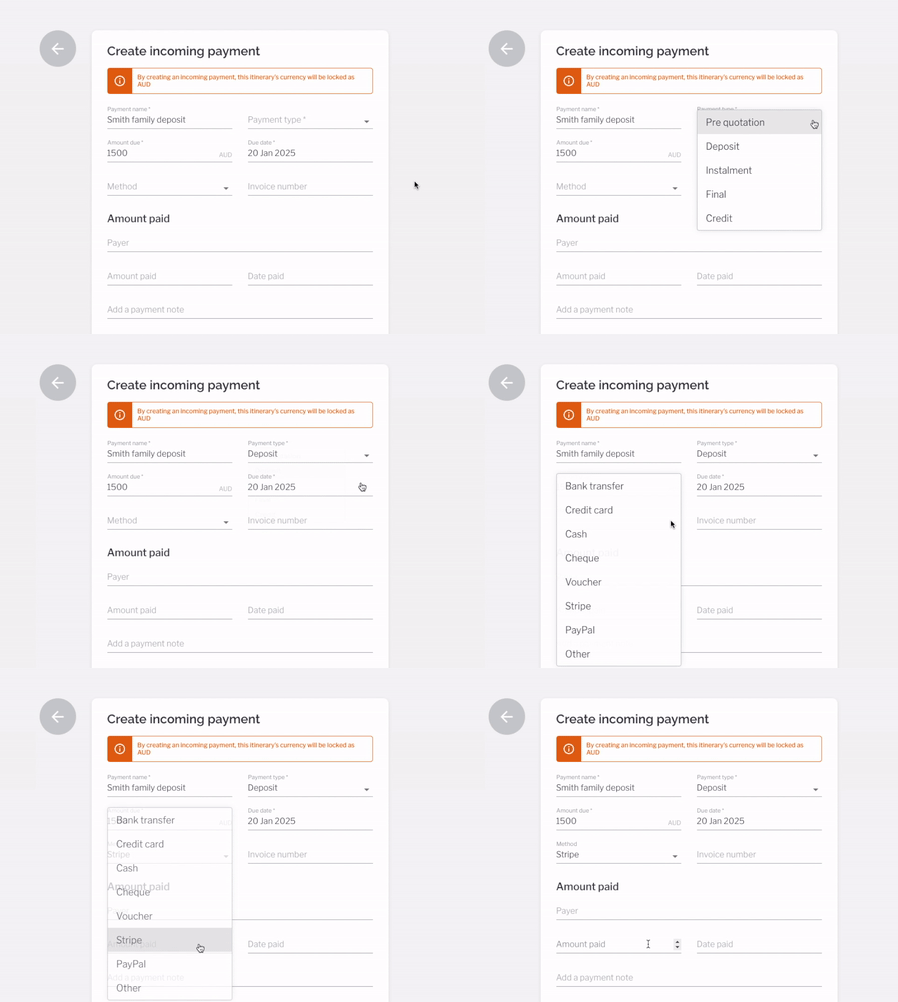
Once your Stripe account is connected to Tourwriter you will be ready to accept payments from your travellers. Follow the steps below to prepare your itinerary for accepting a payment via Stripe:
- Open the itinerary and navigate to the Payments tab. Head to the Incoming Payments subtab.
- Select any Payment type except Credit.
- Select Method as Stripe.
- Enter the Amount due and fill in the rest of the fields before saving the payment.

- Once the Proposal or the Final itinerary is shared either privately or publicly, your traveller will be able to select the Pay now option in the footer of the itinerary.
- When the traveller selects Pay now, they will be prompted to enter their card details and complete the payment.
- Once the Stripe payment is paid, you can create another Payment record using Stripe. i.e. you can receive multiple Stipe payments, but only one unpaid Stripe payment will be allowed at a time.
Note: The terms & conditions on the payment window directs you to the Terms & conditions page in the Default settings section of your organisation settings.
Once payment has been made, the Payment section on your itinerary will display Paid. The traveller can also accept the Terms & conditions if the itinerary was shared with them privately.
Note: You can receive Payments via Stripe for both B2C as well as B2B Itineraries i.e. an itinerary with Agencies.